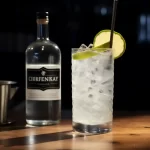
Cocktail photography has become a popular trend on social media, and with good reason. The colorful drinks and creative presentations are visually stunning and can garner a lot of engagement. However, taking beautiful cocktail photos is not as simple as it may seem. In this article, we will provide tips for stunning cocktail photography that will help you capture the essence of these delicious drinks and make them look as good as they taste.
Equipment Needed for Cocktail Photography
Before getting started with cocktail photography, you need to ensure you have the right equipment. A good camera and lens are essential, but there are a few other things you will need as well. These include:
- Tripod: Helps you keep the camera steady and allows you to experiment with different angles and compositions
- Remote trigger: Prevents camera shake when taking photos
- White bounce card or reflector: Used to bounce light onto the subject and reduce harsh shadows
- Spray bottle: Helps to create condensation on the glass
- Cleaning cloth: To keep your glassware clean and free of smudges
Setting the Stage: Choosing the Right Background and Props
The background and props you choose for your cocktail photography can make a huge difference in the final result. You want to choose a background that complements the drink and enhances its colors and textures. Solid backgrounds such as marble or wood work well, as do patterned backgrounds that are not too busy.
When it comes to props, less is more. Keep it simple and choose items that will add to the overall theme or mood of the photo. A few cocktail ingredients or a small plant can make a big impact.
Lighting: Essential for Great Cocktail Photos
Lighting is arguably the most important aspect of cocktail photography. Natural light is the best choice, but if you are shooting indoors, you will need to use artificial lighting. Soft, diffused lighting is ideal for cocktail photography. You can achieve this by using a lightbox, softbox, or diffuser.
If you are using natural light, try to shoot during the golden hour (the hour after sunrise and before sunset). This will give you a warm, soft light that will enhance the colors and textures of the drink.
Composition and Framing: Telling a Story Through Your Photos
Composition and framing are important in any type of photography, but they are especially crucial in cocktail photography. You want to tell a story with your photo and make the viewer feel as if they are in the scene.
One way to achieve this is to use the rule of thirds. Imagine your photo divided into thirds both horizontally and vertically. Place your subject at the intersection of these lines, and you will create a more balanced and visually pleasing photo.
The Importance of Color in Cocktail Photography
Cocktails are all about color, and your photos should be too. You want to capture the vibrancy of the drink and make it look as appetizing as possible. To achieve this, use a color wheel to choose complementary colors for your background and props.
You can also play with color by adding different garnishes or ingredients to the drink. For example, a bright red cherry on top of a green mint drink will make it pop and stand out in your photo.
Capturing the Details: Focus and Depth of Field
When taking cocktail photos, it’s important to focus on the details. Use a shallow depth of field to create a blurry background that will highlight the drink. This will draw the viewer’s attention to the details of the cocktail, such as the bubbles, garnishes, and colors.
You can also play with focus by selecting one specific element of the drink, such as the rim of the glass or the garnish, and making that the focal point of the photo.
Choosing the Right Glassware and Accessories
The glassware and accessories you choose can make a big difference in your cocktail photography. You want to choose glassware that complements the drink and enhances its colors and textures. A stemless glass or a martini glass can make a cocktail look more elegant and sophisticated, while a tumbler or a mason jar can give it a more rustic or casual look.
When it comes to accessories, keep it simple and choose items that will add to the overall theme or mood of the photo. A cocktail shaker, a strainer, or a jigger can add a touch of authenticity to your photos.
Adding Extra Elements to Your Cocktail Photos
Sometimes, adding extra elements to your cocktail photos can make them even more interesting and engaging. You can experiment with different backgrounds, props, and lighting to create a unique look and feel. Adding elements such as smoke, fire, or dry ice can also add a dramatic effect to your photos.
Editing Your Cocktail Photos: Tips and Tricks
Editing is an important part of any type of photography, and cocktail photography is no exception. Editing can help you enhance the colors and textures of the drink, remove any imperfections or distractions, and create a consistent look and feel.
When editing your cocktail photos, use a photo editing software such as Adobe Lightroom or Photoshop. Adjust the exposure, contrast, and saturation to enhance the colors and textures of the drink. Use the spot removal tool to remove any imperfections or distractions in the background, and crop the photo to create a more balanced composition.
Capturing Action Shots
Action shots are a great way to add movement and energy to your cocktail photography. Capturing the process of making the cocktail, such as pouring the ingredients into the shaker or garnishing the drink, can add a storytelling element to your photos.
To capture action shots, use a fast shutter speed and continuous shooting mode. This will help you freeze the motion and capture multiple shots in a short amount of time.
Taking Photos of Mocktails
Mocktails are non-alcoholic cocktails that can be just as visually appealing as their alcoholic counterparts. When taking photos of mocktails, use the same tips and tricks as you would for regular cocktails. Focus on the details, use complementary colors, and experiment with different glassware and accessories.
Shooting Videos of Cocktail Making
Videos are becoming more and more popular on social media, and shooting videos of cocktail making can be a great way to showcase your skills and creativity. When shooting videos, use a tripod and a remote trigger to keep the camera steady. Focus on the process of making the cocktail, and add music or sound effects to create a more immersive experience.
Conclusion
In conclusion, taking stunning cocktail photos is a combination of art and science. You need to have the right equipment, lighting, and composition, as well as a creative eye and attention to detail. By following the tips and tricks outlined in this article, you can create beautiful and engaging cocktail photos that will captivate your audience and make them thirsty for more.
FAQs
- Do I need a professional camera to take good cocktail photos?
No, you don’t need a professional camera to take good cocktail photos. You can take great photos with a smartphone camera or a point-and-shoot camera. However, if you want to take your photography to the next level, investing in a DSLR camera and a good lens can make a big difference.
- Can I use artificial lighting for cocktail photography?
Yes, you can use artificial lighting for cocktail photography. Soft, diffused lighting is ideal for this type of photography. You can achieve this by using a lightbox, softbox, or diffuser.
- How can I create a blurry background in my cocktail photos?
You can create a blurry background in your cocktail photos by using a shallow depth of field. This will help draw the viewer’s attention to the details of the drink, such as the bubbles, garnishes, and colors.
- What kind of glassware should I use for cocktail photography?
The glassware you choose for your cocktail photography should complement the drink and enhance its colors and textures. Stemless glasses or martini glasses can make a cocktail look more elegant and sophisticated, while tumblers or mason jars can give it a more rustic or casual look.
- How can I make my cocktail photos more interesting?
You can make your cocktail photos more interesting by experimenting with different backgrounds, props, and lighting. Adding elements such as smoke, fire, or dry ice can also add a dramatic effect to your photos.


